Friday, January 27, 2012

I see Butterflies


To create this battery operated candle holder, I bought a rose bowl and a candle holder. I purchased a 3D butterfly file from the Silhouette Library and got cutting. First, I etched the glass. Once the etching was done, started adding my butterflies. I worked from the top down. I used E6000 to glue them on to the glass. I placed the battery operated candle on the candle holder then placed the rose bowl on top (upside down). The candle holder is silver - even though it looks gold, sorry for the bad lighting.

If you enlarge the first picture you can see the candle inside the bowl.

Sunday, January 22, 2012

Mason Jar - Soap Dispenser


I found this idea at Blissfully Content.

I love how her's turned out but without the proper items on hand, I hand to improvise. (Because I couldn't wait to try this project!)

Luckily, my husband was making chicken fettucine alfredo tonight so while he was grilling the chicken, I got busy removing the label on the jar. I spray painted the top to match the Aveeno lotion dispenser. I will probably change this in the future, I really would like silver instead.

Visit Julia's website and take a peak at her canning jar soap dispenser as well as her other great ideas.

Birthday Shirt

My daughter and I made this shirt for her Birthday party. I made the cupcake and she added the rhinestones. I bought the cupcake from the SIL library.

Saturday, January 21, 2012

Large Rosette

I am intrigued by rosettes and how they work...even though I work in an engineering "field" I am NOT an engineer. I am the ONE that keeps the engineers on track. I cut the rosette file at 2.5 x 11.88. Guess what I found out...I need 2 at that size. I cut another one, taped them together, then added a circle in the middle to the back and front. Next, I cut another rosette at the original size, 1.08 x 11.88 and a circle at .930" (one for the front and one for the back). Voila, another rosette!

Edited to add:
I took 2 pieces of 12 x 12 pattern paper and glued them together since I want this to be pretty from the front and back. The back is pink and I added a circle to the middle as I did on the front, I plan to add another rosette to the back. This will be part of a bouquet I am using for my daughter's birthday party.

Another look at my pinwheels


The title should say, "Another look at OUR pinwheels".

I was able to get these pinwheels so they spin today. I picked up the last eyelet setter Hobby Lobby had. I didn't get the Big Bite as planned. Thanks to my hubby for helping with this project. He said anytime scrapbooking involves a hammer, he is willing to help. It was fun working together and the project went by so fast (too fast for him)!

Same idea, different day...

I am about to fire my photographer...lol. I had him retake the pic below because it was too dark...

I made these pinwheels as one of the party gifts for my daughter's birthday party. Tomorrow I must buy a big bite so I can make these pinwheels spin-able! I made some for the boys and some for the girls. There are dinosaurs, monkeys, cupcakes and art deco on these pencil toppers.

The kids helped with this project by putting erasers on the top of the presharpened colored pencils.

I plan to use this as a table decoration and hand the pinwheels out as the kids leave the party.

Thursday, January 19, 2012

Birthday Invitations

(Click to enlarge)

I made these invitations for daughter's birthday party. She has been so excited to have a party for months. She wanted to have it at home but I wasn't up to all the work, so she had to settle for something else (bad Mommy!).

I embossed the blue layer with a snowflake folder and then inked it with white craft ink. Love this effect! I made the envelopes because I didn't have any nice sturdy envelopes on hand.

My husband helped with this project by embossing the envelope inserts and also blurring out the important information on the invitation. Wahhooo, thanks honey!

Stay tuned for party decorations in the near future!

Sunday, January 15, 2012

Dino-mite!

(Click picture to enlarge)

I made these Valentine treat bags for my daughter's class. I am a little early, trying to stay on top of things. I have more to make, I just haven't put the candy in the bags yet. I found the candy at Cracker Barrel, not our favorite place to eat, but they serve breakfast all day :-)

I tried cutting this paper with my Imagine but it kept eating my paper, so I quickly abandoned that idea, bought a dinosaur file from SIL and got busy! I cut 3 dinosaurs with Kraft paper and once with the pattern paper. I wanted it to be sturdy since the dinosaur is kinda hanging off the sides.

Thanks to my hubby for taking this picture for me, isn't he sweet?

Sunday, January 8, 2012

Lettering Delights File used with SIL Studio


I have been wanting to play with SVG files and haven't really known what to do. With the help of Jin's Website, I was able to get a couple of images imported in to the SIL software. This is a bag I purchased from Lettering Delights. The download came with the .gsd file I needed to open in the SIL Software. This is so exciting, I love having options. It has been fun learning something new.

Have a great week everyone!

Friday, January 6, 2012

160 cuts in about 2 hours

I am room mom for my daughter's class and I told her teacher months ago, I can cut images for her if she ever needs anything. In Nov and Dec she had time slots for us to come in and craft with the kids and we could do our own projects if we wanted. If you remember we did the Turkey bags and the Gingerbread houses. After that, she asked me to cut gingerbread people for her and this week she asked me to cut 60 snowflakes and 100 mittens.

For this project, I had to break out the Imagine. I was planning to have 3 machines working at once, but I didn't have the energy to set up the third, haha. I used my Cameo to cut the really fancy snowflakes and I used the Imagine to cut the other snowflakes and the mittens.

It took about 2 hours I think. I had extra mats so I could have a mat ready when one came out. The Imagine tried to eat 2 of my mats, not sure what happened, but one of the mats, I will not put back in the machine, it bent the corner and I am scared to use it again.

The Cameo was definitely quieter than the Imagine. My husband even commented on it without me even asking him. The other thing I liked about the Cameo was that I used the SIL Studio Software to maximize my cutting space. I could have done this with the Gypsy and the Imagine but to me, that was too much trouble since my Gypsy isn't even charged right now. I have never found the Gypsy to be a must have tool for me. I know a lot of ppl have it and love it - that is great. I wish I loved it as much.

So, with the Cameo, I was able to cut 8 - 4" snowflakes on a 12 x 12 piece of paper and with the Imagine, I only got 4 on a page. Both machines cut really well. I hope my kids are not disappointed I accomplished this project on my own tonight. I told them they may have to help and they seemed happy about that.

I plan to make a 3D robot with my son tomorrow, if time permits. He brought out the robot cart and was talking about one of the robots he wanted - but said I didn't have to make it if I didn't want to. I had read a long time ago on the MB that is was impossible to put together, but I know we can do it!

I wasn't sure I could complete this project in a weekend. I actually was a little scared, glad everything went so well.

I'll be impressed if you make it through this entire post...haha Sorry it was so long!

Monday, January 2, 2012

Tin Roof...Rusted!

The barn


The barn roof


My Dad's hat we found in the barn


Guess who these hands belong to...


I am working on a layout of pictures we took at a barn on my parent's farm (just before it was burned down). My husband walks by and says "Nice layout", really? haha, he cracks me up! What does he know about layouts? I guess he does pay attention. him!

BTW, the thread name is from a song and it is my layout theme...know it?

Saturday, December 31, 2011

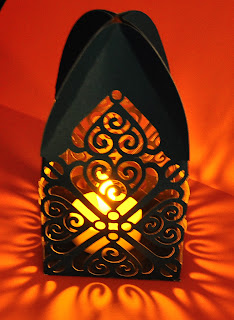
Box Tent with Swirls


I keep seeing this image on the back of the Cameo box, and I just had to try it! WOW! Not one snag in the cut.

Friday, December 30, 2011

Trying out new Sizzix Embossing Folders

To create this card, I used the Sizzix embossing folder seen below. I used Stuido G and Stampin' Up ink with the Stampin' Up blender pens to fill in the raised embossed images. I don't own a Sizzix machine, so I ran this through my Cuttlebug using plates A, B and B and it worked wonderfully!


(Front of card)


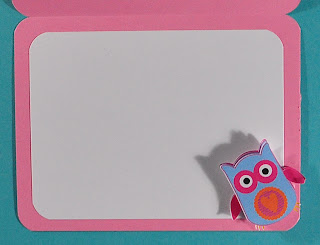
(Inside card)


To create the owl card, I also used the Sizzix embossing folders listed below along with my home printer, pattern paper and my Silhouette Cameo. Ink and floss were the final embellishments.

I found the following at JoAnn's. My friend gave me a gift card for JoAnn's for my birthday - so I took advantage of it today. Thanks Ann! I also got a 3 drawer container to hold my 12 x 12 paper, but I don't think it is going to fit in my closet, so I may have to take it back.

Both of the following packs came with dry embossing folders as well as 1 die cut. I don't use die cuts, but I will make a point to use these along with the embossing folders. They are so cute!


Thanks for looking! Let me know what you think ;-)

Thursday, December 29, 2011

A link to register to win a free Cameo

Anyone want a chance to win a Cameo?

Here you go, many opportunities to win!

Click -----> Silhouette Cameo Give Away

Good luck!

Wednesday, December 28, 2011

Organization

How do you do it? I have spent 2 evenings cleaning out and organizing my scrap closet. I have more paper than any girl needs...some is getting donated but most is staying. How do you organize your 12 x 12 paper? I wanted to hang mine in file folders and put it in my desk, but it is a tad bit too big. So back to the closet it goes.

Another thing, how do you decide what scraps you keep and which ones get canned? I allow myself one jetmax cube for scraps but I find myself not using them much any more. I am going to try to use my scraps more and also use the pattern paper I have on hand instead of printing my own paper.

I should have a pic of my closet tomorrow. I need to make some labels for my jetmax drawers. I look forward to your comments!!!

Tuesday, December 27, 2011

Happy New Year!


(Click picture to enlarge)

Happy New Year, will be here before we know it...so I made this little card tonight. I have to admit, it took a while. I am so used to print and cut with the Silhouette. Tonight, I thought I would piece this card together. I started with the little tree. Next, I created the Mama owl and last, I created the little owl.

I think this is a little outside the box for me, but I love this card.

Saturday, December 24, 2011

Snowflake

I made this snowflake using my NEW Silhouette Cameo. I didn't ask for it, but hubby surprised me. He took the blade (and blade housing) out of the box and wrapped it in a medium size box, along with SIL software and a $10.00 download card. I was so confused on why they would send software with the new blade - I just sat there staring at it. He left the room and I didn't really notice. Then he walked in carrying the Cameo and wanted to know if it would work in "this". uuuuhhh yeah! What a surprise...now I am back to cutting 12 x 12, real 12 x 12!

This was my first cut. I put it on tree - I guarantee my daughter will notice first thing tomorrow morning.

Isn't he the best??? Yes, he is!

Merry Christmas to all!

We have never made Reindeer food, but when I saw Tanya and her granddaughter had made it, I thought, hmmm, that might be something fun to do with the kids.

They loved it! My son measured the oatmeal, while my daughter added the glitter. We sprinkled it on the driveway just before bedtime. While we were sprinkling, my sister texted to let us know Santa had been spotted in our county by the Sheriff department. Inside we ran and off to bed the kids went, as I read "'Twas the Night Before Christmas" to them.

Though it was hard for the kids to settle down and go to sleep, some furry stuffed friends helped them to call it a night.

Merry Christmas to you and your family. May you find happiness in being with family - with or without presents under the tree.

Tuesday, December 20, 2011

Teacher gift


I made this gift card holder for my daughter's teacher. I didn't want to just give her a gift card, so I bought a little Bath and Body Works to go along with the $100.00 gift card (from the entire class). The bath and body scent was perfect, she said she had just bought something in the same scent.

Sunday, December 11, 2011

Christmas Present Box


I made this little box for my Mom's gift from the kids. My mom loves jewelry, all kinds, the real stuff and costume jewelry too. I made the box double sided. The patterns are digital, purchased from Etsy. Tulle and ribbon finish off this adorable box.

Initial Post It Covers

Post-It Note Magnetic Covers - PC and Silhouette vinyl


Before I altered the inside


After I altered the inside.

My daughter asked me the other day if she could have one of my post it notes. As I was shopping for pens today, I had an idea to get my daughter her own post it notes and this is what I found.

I also bought one for my son but didn't realize it had flowers on the inside until I got home. I added some embossed yellow (his favorite color) to the inside flaps to cover most of the flowers.

I know I could have made these covers, but they would not be as sturdy as these. For kids, I feel they need to be heavy duty, haha.

I plan to put these in their stockings with some mini pens.

Monday, December 5, 2011

Secret Pal


So, here are the gifts for my son's secret pal at school. He was excited, he thought they were great. I bought the bags at Dollar General...it's the only store on the way home from school. They aren't due until Friday, but I am excited to be ahead of the game and get these turned in tomorrow.

Sunday, December 4, 2011

Gingerbread men - 37 of them!


This is my second time cutting 35+ gingerbread men. The first time, I cut them for my sister and this time, I cut them for my daughter's teacher. Whew! That takes a while. I can hardly wait to see what they do with them. I am not involved with this project. I know it will be creative, she has an awesomely creative teacher.

Pinwheel Pencil Topper


I made this pinwheel pencil topper for my son's secret pal at school. His name is Cameron, so I put a "C" on it since I don't know his interests. I dry embossed the multi-layered 1 3/4" circle. Oh - and yes it does turn. I used an eyelet and a brad to make it spinable!

Also showing off my new "31" caddy. Not sure what I am going to do with it, but isn't it adorable?

Friday, December 2, 2011

Snowman Soup


(Click pictures to enlarge)

I am joining all of you who have ever made Snowman Soup. Never thought I would make these, but they have been a joy to make. So easy, esp when you have a wonderful 5 year old willing to help with every step.

The only thing we had a hard time with is getting the little marshmallows in the little bags...they kept falling on the counter, which meant, they must be eaten right then and there. ;-) She was so cute, her brother was off on a playdate and she wanted to save "the rest" of the marshmallows for him. Little girls can be so sweet!

I designed the topper using my Silhouette. The base is a card that has a perforated middle section so it is easy to fold. YAY! The background is a digi paper I bought from Etsy. The snow man and "Merry Christmas" are SIL files I purchased.

I am making at least 20 of these and about 15 of those goes to school (lunch room workers, PE teacher, music teacher, art teacher...) Their teachers get a nicer gift, hate that I can not afford a nice gift for all of them, they are all so important.

My husband just stole one of these to take to work. (I'll be making more.)

Decorated Gingerbread house


Well, today was the day I got to play with a kindergarten class. The kids loved this project. The most loved part was the GLITTER GLUE! I took 2 bottles - should have taken at least 4. They were all precious and the teacher loved the houses (even before we decorated them).

I made the peppermint candy with my Silhouette and turned them in to stickers using my Xyron. My husband twisted the pipe cleaners (candy canes) for me - I tried but just couldn't get it. I bought the pom poms and stickers at Michaels right before we began our project.

They all looked different, some had a ton of pom poms - some had a few like my daughter's in the pic above. Some had a lot of glitter, some had a little, they all did a great job. I was so proud of them!

At the end, I gave them a battery operated candle to go on the inside. (I explained to them not to use a real candle.)

It was a lot of fun and the kids loved it...doesn't get any better than that!